Flat roofs made from fibreglass are not an uncommon sight and have been around in the UK for 30-years plus, however, only recently in the last 10-years has the Glass Reinforced Plastic system roof, or better known as GRP system, has really grown and due to the advanced technologies in GRP interest for this roof system has increased exponentially. The incorrect use of hard bot resins instead of formulated roofing resins leading to poor installation technics in the early days deterred many people from using the system. Nowadays approved installation techniques and methods of creating a join less flat roof have lifted this flat roofing system to new heights and it is now very sought after and desirable.


The layers consist of:
The positives to a GRP fibreglass roof:
The negatives to a GRP fibreglass roof:
Lead work and drip-beaded edges are used to complete all our flats roofs as required and necessary. If you decide you want to ensMost companies will provide you with a 20 to 25-year guarantee as there is usually no problems whatsoever with these systems if they are correctly installed. There are GRP roof about that are 30 years old and the only signs of wear was slight discoloration fading to the final topcoat.
Some facts regarding a GRP System
The cost is usually more expensive than a felt roof EPDM rubber roof and is dependent on the specification required such as the final finish option and lamination thickness.
The suitability purpose has different aspects, its lightweight and good for green roofs, attractive to look at, completely joint less, can be used with an abundance of different shapes and comes in practically any colour. Its not really suitable for extremely large areas especially if the roof of flimsy design and can be prone to contraction and expansion from weathering conditions. Not hot works are necessary for its installation.
It is robust and can hold up against continuous footfall but without an anti slip coating it will be slippery. It is impermeable to most forms of abuse such as vandalism and knife slashes.
Repairs can vary from a complete new layer directly applied and bonded to the top layer to a small patch repair. Most repairs if done correctly are practically invisible.
Look wise, you cant really beat it. With a huge choice of colours for the final coat to choose from you can even blend it in with the main colour of your house. It’s easily cleaned with just soap and water.
The only installation problem really is that the weather must be dry and over a certain temperature and not below 41 degree Fahrenheit. These roofing systems cannot be installed in cold frosty conditions. If you are supplied a quotation and it is considerably cheaper than the other installers just be aware the reason could be due to a lesser quality thickness material being used combined with a poorer installation technic method to install.
It is DIY friendly and small roof coverings can be installed by a competent handyperson. There is lots of guidance available on YouTube.
The installation Process
A GRP fiberglass roof installed and laid correctly can last up to 30-years with no apparent visible signs of deterioration apart from discoloration. The existing roof has got to be dry and at a temperature not below 41 degree Fahrenheit. The material resin coats should be approved products to use for a GRP roofing system.
The information guide we provide here only relates to the application of the GRP lamination and topcoat. Given a 20 sq/m roof two men usually will be able to strip back the old roof, renew the decking, laminate and then apply the topcoat all in just one day. Every installation needs to be planned during a known period of settled dry weather.
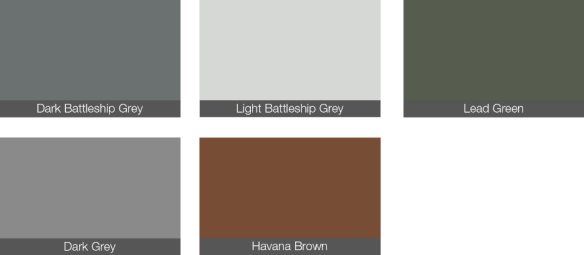
Just a few of the colours available
The Decking
Tongue and groove OSB3 Sterling Board decking should be used, this needs to be fixed down with either screws or ring shanked nails to a minimum depth penetration of 25mm and spaced at 300mm apart throughout the entire length of the roofing joist the board is being fixed to. Make sure that the boards are laid in a staggered fashion and laid the correct way around with the gap between the boards facing upwards so as the resin can flow into the gap reinforcing it when the lamination is applied. Next is to fix the edge trims.
Edge Trimming
Edge trims are available in GRP. One side is glossy the other is a matt finish. The side always used to fix or bond is the matt finish side so as the glossy side is on show. The majority of trims can fixed with staples or nails directly to the decking boarding apart from the angle fillet and flat finish trims, these have to be bonded into place using a suitable adhesive not off the shelve mastics or general purpose silicone sealants.
Any joining of the trims needs to be overlapped and bonded and bandaged together using a suitable adhesive again not off the shelve mastics or general-purpose silicone sealants. The correct adhesive to use would be a Polyurethane Adhesive. A drip fascia trim can be fitted in an offset manner to maintain that the drip can stand over the guttering. Mitres can be cut to form corners or manufactured corners can be purchased. The corners will require sealing in place on site using a section of fiberglass.
The Lamination
It is of vital importance that the lamination is carried out when you know the outcome of the weather forecast and have determined the air temperature. Depending on the air temperature can even affect the size roof you are going to tackle.
A small roof can be carried out on a hot day but longs runs are better to perform on cooler days as the resin will cure at a quicker rate on a hot days in hot conditions, so the glass you actually lay down will be dependent on the temperature conditions. Either way or method the air temperature must not be below 41 degrees Fahrenheit at all.
The glass resin ratio needs to at 1:2:5
Pre cut the glass to the correct sizes and length prior to applying the laminate. Remember to use smaller lengths the hotter the air temperature is. When laying the laminate there is no specific way it should be laid and it really is not important as in which direction the joints are lapped. Ensure the roof is clear of all debris and not needed items, mix the necessary amounts of catalyst with the resin enough to complete the first sections or run.
Wet down the area to be treated then simply roll out the glass. Apply the resin mix to the glass then once allowed to wet out for a minute or two amalgamate the glass using the roller making sure that there are no dry areas of glass left and to ensure that no air has been allowed to get trapped in the laminate.
Avoid stepping onto wet resin and glass while repeating this method for the next section or run overlapping each time by at least 50mm. Continue until the whole roof has been coated completely ensuring the laminate has fused well together.
Top Coat
It is now essential that the laminate now laid be top coated asap. It is not recommended to leave the laminate for long periods like overnight and wait until the next day. The laminate can be tested for cure by exerting slight pressure on it using your finger. When it is not possible to move the glass fibres in capsuled in the resin it is approximately half cured. It will now be able to endure light footfall meaning it is now possible to complete the final topcoat.
Sometimes it may be necessary to be working alone, if this is the case then we suggest you transfer the topcoat into separate buckets keeping the amount in each bucket to around 3 kilograms which is sufficient to cover approximately 6sq/m. Prepare one mix at a time, add the catalyst and apply with the roller maintaining a wet edge at all times. Once the bucket is empty move straight on and catalyse the next bucket and continue from where you left off. Keep a small amount over to complete the edges and fine details.
The topcoat should be of an even layout and no more than half a milometer in thickness. If the topcoat is laid too liberally there is a high probability of cracking occurring. Your new GRP roof is now finished. It will take a further week to completely cure. It can be cleaned with a brush, soap and water. Bleach or strong alkali is definitely not recommended. It will hold up under footfall and can have planters and pots on with no damaging affects. It will last a long time without deterioration. Only from time to time you may find it necessary to decorate the edge trims.
Catalyst additions or amounts:
Troubleshooting:
If this guide is not followed you may well encounter a few issues and problems cropping up during laying the GRP and once its completed. These are some signs and symptoms.


Please feel free to contact us for further advice
If you are interested in booking a survey for any of our services or just a roof safety check, please contact Plymouth Roofing Solutions on 01752 201077 and a member of our team will be happy to help or advise you.
We will make an appointment and one of our surveyors will come to see you, survey the project, have a chat, and give you some free advice. Our team is dedicated in listening to what you have to say and accommodating your every need. We will advise you on what we think would be best and never recommend doing any more than is required or necessary. We also we attempt a solution that stays within a budget that you may have.
Our professional team of qualified tradesmen carries out their work to the highest standard causing you as minimal disruption as possible to your day-to-day life and always leaves the job clean and tidy on a daily basis. We have public liability insurance of £10 million pounds that can be viewed on request. We have skilled tradesmen in all forms of carpentry, roofing, lead work, and lead welding.
